Tuesday, July 29, 2014

The BEST Library Bulletin Boards from Pinterest in One Place


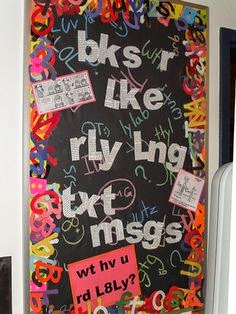
I know that we are all sorting through Bulletin Boards right now. Some years I have even made a Board outline for the year. Good in theory but wasted time because I either see something else I love or time runs out ....or SOMETHING!!

My intention was to "curate" these boards and list the original site. After two boards and 30 minutes, I gave that up - if I know the original source, I list it but most of these have been pinned dozens of times at least.

NONE of these are my original boards - I have created variations of some of these but mine are not pictured. Here's to early August and getting up those boards!


Wednesday, July 23, 2014

STEM-TACULAR Picture Books


This will be our third year as a STEM school at Edmondson. The language is coming more naturally, the expectations are growing, and STEM is becoming part of our every day learning.

As far as building a "STEM" Library, the timing could not be better for me. Publishers are creating lists faster than we can purchase and the Common Core has a strong STEM focus. Here are some of my favorite STEM picture books that we have added to our Library.

By no means is this a comprehensive list - the hardest part is just sticking to my list that I jotted down during the spring.

By Andrea Beaty


By Andrea Beaty


By Candace Fleming

By Jessie Hartland


By Brenda Z. Guiberson


By William Kamkwambe and Bryan Mealer


By Alison Formento
By Laurie Lawlor


By Alan Madison

By Mary M. Cerullo and Clyde Roper


By Mary M. Cerullo

By Kathleen Krull
By Jon Scieszka
By Corey Rosen Schwartz

By Margaret McNamara
By Dr. Phillip Lars Manning

Monday, July 21, 2014

Senior Pictures - No Pressure Thanks to PicMonkey!

My oldest daughter will be a senior this fall. For the last few years we have had our eyes on Senior Pictures, thinking about what she wants. When did this phenomenon happen? This is intense - the photos must be beautiful, unique, on location - to name a few!!

That sounds like something best left to professionals until you check out the pricing. The average in Northern Colorado ran 150 for booking fee, an extra 175 for location fee, portfolio (printing) fee of 425. Aye! - and that's before we order prints for family.

My daughter and I made a deal: we would try them ourselves first. If we were not happy we would hire a pro. The first batch was easy breezy! The outside scenery and lighting did most of the work. Looking at them now I may have been a little too excited about the "sun" feature - but the cool thing is I can change that whenever I want.


The second round (the basketball group) were scary horrible. Cranky, what were we thinking, call a photographer, make room in the budget NOW bad. This is where PicMonkey saved the day.

I really almost gave up - then on a whim I uploaded one to www.picmonkey.com. I cropped first, then adjusted the shadows which darkened the ugly sheet we used and turned it into the stylish background we imagined. After adding the spotlight feature I could not believe we had the same picture! Here are some before and afters:


 I should mention that I pay the 4.99 per month subscription fee at PicMonkey - I am not sure whether some of the editing features I used are part of the subscription. I use PicMonkey all the time but this by far has been my favorite project - and the biggest money saver!

Thursday, July 17, 2014

Real Gel Nails that didn't break the bank - PERFECT for my Librarian Friends

True confession time. I am from Texas and as stereotyped as it sounds, it's hair and nails, nails and hair. To this day the first thing I notice about a woman is her nails. Consequently, too much of my waking time is devoted to thinking about my own nails. This can be confirmed by visiting my Nails, Nails, Nails Board on Pinterest.


When I started working in the computer lab before the library, the nails went short after two days. In the Library, they have stayed short. I admire my friends who can keep a nice mid length nail but it is not happening for me (shelving books, keyboards - enough said).

About two years ago my husband bought a UV light for me to speed to process of weekly manicures. It was amazing! But my nails still chipped, no matter which process I used (and I feel I have tried them all).

And, cue Pinterest! I LOVE how Gel Nails look and I was totally sold on the claims of three week manicures. Too good to be true? The price was killing me. The LED lights I saw online ranged from 65.00 to over 150.00. The actual polish is not ultra expensive at about 12.49 a tube but when starting it is an investment.

Gel Nails can also seem tricky in the beginning, so I searched and searched  posts and tutorials. This, by far, was the most comprehensive blog I found on Gel Nail application.

http://www.luluandsweetpea.com/2013/01/diy-gel-nails-at-home.html


Sally Beauty Supply had the Gelish Mini LED Lamp on sale for 34.99 when I went by. (*note that the power cord was an extra 14.99 but which of us doesn't have a drawer full of extra cords?) MUCH BETTER than 65.00 plus! This is the mini and I cure four fingers at a time with the thumbs going last for the third round. At 45 seconds a piece I can handle that for sure. One feature I really like about this lamp is that it shuts off after 45 seconds. I don't have to even keep track of that!


When I was at Sally's Gel Paints were BOGO, another score!! I was able to get Gel Base, Gel Top Coat, and two colors for 24.50. I was thrilled walking out of Sally's having spent 60.00 for everything I needed to get started with my Gel Nails.

I could NOT BELIEVE how easy the application was and how AMAZING the results were. That gel is not going anywhere!  Like I read time and time again, I changed colors because of regrowth.

The downfall of Gel Nails is taking me some time to adjust to: when people say removing them is a pain, that is the UNDERSTATEMENT of the YEAR. This post is the method I am using right now, and know that it takes at least 25 minutes. My hope is I will get better at this and decrease that time.


Thursday, July 3, 2014

FINALLY! Good Bye, Oak Cabinets

Ok, I know this blog is about how STEM fits into Media and the state of school Libraries today. This post today is about the state of this Librarian this summer. And today I am MUCH more calm and pleased with life than even three days ago.

Three days ago, my kitchen looked like this:


We bought this house ten years ago and had a rate locked in that was fantastic. We needed a house that was almost ready to go and this one was - complete with the horrible oak cabinets.  I have hated them for years and years! Fortunately, life is so crazy fast that this detail was on the back burner. But Pinterest has changed that. Blog after Blog shows us how easy this is. This summer painting our cabinets was my number one goal.

In the spring I grabbed a few of the free Valspar paint samples from Lowes and painted the back of some cabinets so we could all choose a color. Hands down, English Tea Party from Valspar won.

When it came time to get going I checked out more blogs and decided to go with Denatured Alcohol for stripping/ cleaning/ degreasing. I had used Binz Primer before and knew what a great product this is, so I did not have many decisions to make.


This is the part where I start to think I am crazy - and my husband is already done with this project!! It was a great chance to finally go through drawers and clean them out, so no one complained when that was done.

My 17 year old daughter was my partner in this and she killed it! Were it not for her I would still be in the garage covered in paint and primer. 

We removed all doors and drawers, degreased, and applied one coat of primer. We just used foam brushes for the primer and it was great for the thick primer. It doesn't sound like a lot, but that was all we got done in day one. People like to eat and do other stuff around my house, unfortunately.

Day two was the day for paint. I hit the corners and details with a nylon brush and my daughter came behind and used a foam roller for cabinets. We tested and the roller was by far the best finish.

In our CO air our doors dried within 90 minutes and were ready to be flipped. By 3:30 our last coat was almost dry and it was time to think about re-assembly.

Honestly, this was the hardest part. We were totally "done" with being together for so long and ready to have the kitchen back (I know, after two days!!) The doors were tricky and took some time to adjust so everything was level and flush.

*I purchased some Minwax Finishing Paste that I intended to use after the semi-gloss paint but I did not like it. I felt like it clouded the surface and got "gunked up" in the details of the cabinets. I am thrilled with the finish right now so I am going with nothing on top.*

  
Primer 1 quart Binz 9.98
Paint 1 gallon Valspar Semi Gloss 32.99
Brushes 22.00
Denatured Alcohol 9.98
Pizza for my Partner 5.50

Total Cost 80.45